Garden Edging That Lasts: How Concrete & Aggregates Help Shape Landscapes
May 2, 2025
Garden edging serves as both a practical boundary and an aesthetic frame for outdoor spaces. By clearly defining lawn areas, planting beds, and pathways, edging creates a polished look that enhances overall garden cohesion. Durable edging solutions must withstand soil pressure, foot traffic, and changing weather conditions without shifting or deteriorating. Poorly executed borders can lead to maintenance headaches, uneven plant growth, and water pooling, detracting from the intended landscape design.
Concrete and aggregate materials offer a versatile palette for long-lasting edging profiles. Whether formed into crisp geometric lines or flowing organic curves, these materials resist rot, insect damage, and frequent repair. Their robustness reduces the need for labour-intensive maintenance, freeing up time for more creative garden tasks. With the right selection and installation, concrete and aggregates can remain functional and visually striking for decades.
Common Garden Edging Problems (And How to Avoid Them)
Garden borders often suffer from problems that undermine their appearance and performance. Shifting soils, encroaching weeds, and poor drainage are recurring challenges that compromise the integrity of edging elements. Understanding these common issues is the first step towards specifying materials and installation techniques that prevent failure. By adopting best practices in design and construction, gardeners and landscapers can deliver borders that maintain their shape and function with minimal upkeep.
Soil Movement and Edge Displacement
Soil expansion, contraction, and lateral movement place constant pressure on edging components. Seasonal cycles of wetting and drying can cause the ground to heave or settle unevenly, leading to misaligned borders. Without measures to stabilise the soil, edging blocks or slabs may tilt, creating unsightly gaps or tripping hazards. Planning for ground movement during installation ensures that edges remain straight and true over time.
Outlined below are key factors that contribute to soil movement and strategies to counteract displacement from the outset.
Base Preparation Failures: When the underlying soil is not properly prepared, fluctuations in moisture cause sections to settle at different rates. Loose topsoil provides insufficient support and allows edging materials to shift under load. Incorporating a compacted sub-base of sand and aggregate, crushed rock, or gravel distributes weight uniformly and reduces future movement. Regular inspections during installation help confirm that the foundation layer is stable before laying concrete or aggregate edging.
Inadequate Soil Compaction: Simply ramming down the surface is rarely enough to create a load-bearing platform. Professional compaction equipment or repeated passes with a plate tamper achieve uniform density in the trench. Overlooking compaction can lead to low spots where water collects, exacerbating soil creep under edging units. Verifying compaction rates with a simple soil density test can prevent costly adjustments later.
Tree Root Intrusion: Roots growing beneath or adjacent to edging exert upward and lateral pressure, cracking concrete and displacing aggregate borders. Identifying mature trees and root zones before installation allows for buffer zones or root barriers. Installing a root-inhibiting membrane along the trench can deter root ingress while still permitting healthy growth. Periodic checks for new root activity help catch problems before extensive damage occurs.
Weed Encroachment Between Edging and Soil
Gaps between edging elements and planting soil offer an invitation for weeds to flourish. Even narrow voids can rapidly fill with unwanted vegetation, compromising the border’s neat appearance. Persistent weed growth can also dislodge edging materials and create uneven lines. A combination of physical barriers and strategic detailing prevents weeds from establishing sawtooth patterns that undermine the original design.
The following points detail common weed-related pitfalls and preventative measures for seamless borders.
Absence of Weed Barrier Fabric: Relying solely on concrete or aggregate without an underlayer of geotextile fabric invites weeds to penetrate through fine gaps. Fabric liners block weed seeds while still allowing water to drain away from the soil. Choosing a UV-stabilised, permeable membrane ensures longevity beneath sun-exposed edges. Overlapping fabric seams by at least 150 mm prevents weed threads from slipping between panels.
Gaps and Voids Between Edge and Soil: Even perfectly laid edging can separate from the soil due to shrinkage or erosion. Filling narrow gaps with polymeric sand or fine gravel locks the border in place and prevents weed seeds from settling. Periodic topping up of infill material maintains a snug fit without disrupting the edge profile. Consistent compaction of infill ensures that the barrier remains effective over multiple seasons.
Inadequate Edge Height: Edging set too low relative to the soil line becomes submerged by runoff and plant growth, creating warm, damp conditions ideal for weed germination. A clear height difference of at least 25 mm between the soil and the top of the edging deters creeping weeds. For sloping sites, stepping the edging or terracing maintains consistent height and reduces the risk of washout. Adjusting edging height during installation avoids retrofitting adjustments that can look patchy.
Poor Drainage and Erosion Effects
Water that cannot drain freely along garden borders may pool against edging, eroding the base and washing soil into adjacent pathways. Over time, saturated soil loses its cohesiveness, causing the edge to lean or collapse. Proper attention to surface and subsoil drainage prevents water-related damage and preserves the crisp line between planting areas and other zones. A system that channels excess moisture away from borders sustains both hardscape and softscape elements in harmony.
Below are critical drainage missteps to watch for and design strategies to mitigate erosion near edging installations.
Incorrect Slope Away from Beds: Edging laid on a surface without a slight slope towards a collection point traps rainwater against the barrier. Implementing a fall of at least 2 % ensures surface runoff moves away from the edge towards drains or gravel-filled channels. During installation, a string line and spirit level confirm a consistent gradient along the entire border. Revisiting the edge’s profile after rain events can validate that drainage remains effective.
Lack of Weep Holes in Concrete Blocks: Solid concrete blocks resist lateral water pressure but can build a water table behind the barrier if not relieved. Drilling strategic weep holes at the block base allows trapped water to escape gradually. A series of holes spaced at 300–500 mm reduces hydrostatic pressure and prevents the bowing of the edging units. Covering weep holes with mesh filter fabric deters soil from clogging the openings.
Use of Impermeable Materials Without Channels: Aggregates pressed into resin form an impermeable surface that directs water rather than absorbing it. Canal drainage or French drains parallel to the edging ensure that runoff does not undermine the structure. Installing a perforated pipe within a gravel-filled trench provides an underground escape route for subsoil water. Regularly flushing the channel maintains free flow and prevents sedimentation over time.
The Benefits of Using Concrete for Garden Edging
Concrete remains one of the most reliable materials for garden borders due to its inherent strength and design flexibility. Commercial-grade mixes can withstand foot traffic, mower impacts, and freeze-thaw cycles without significant cracking. Beyond mere functionality, concrete can be colour-tinted, stamped, or moulded to complement surrounding paving, creating a cohesive hardscape language. Its density also serves as a solid barrier to contain soil and decorative stones, preserving sharp lines and controlled planting zones.
Concrete edging offers cost-effective longevity when compared to timber or plastic alternatives. While initial installation may demand skilled labour and curing time, the lifetime performance typically justifies the upfront effort. The material’s weight alone resists lateral soil pressures, eliminating the need for complex anchoring systems in most applications. Additionally, concrete blends well with aggregates, allowing hybrid solutions that combine texture and durability.
Durability and Longevity of Concrete Edges
Concrete’s resistance to decay and mechanical abrasion makes it the first choice for busy landscapes that demand low maintenance. Unlike timber, it does not rot or attract pests, and it does not fade under UV exposure. When correctly mixed and poured, a concrete border can remain structurally sound for decades with negligible upkeep. Proper sealing can further guard against surface staining, efflorescence, and minor cracking, ensuring it retains its original character over time.
Outlined below are the primary durability attributes that contribute to concrete’s long-term performance.
Resistance to Rot and Insect Attacks: Wood borders require regular replacement when exposed to ground moisture and termites. Concrete remains inert in contact with soil, avoiding the deterioration mechanisms that affect organic materials. This inertness ensures that concrete edging retains form and function without annual chemical treatments or stains. Over multiple seasons, property owners gain cost savings as the concrete simply needs occasional cleaning rather than full-scale replacement.
Ability to Withstand Heavy Loads: Garden borders along driveways or parking areas are subjected to vehicle weights that exceed pedestrian traffic by orders of magnitude. Concrete’s compressive strength easily supports cars and trucks without chipping or shifting. When edges are cast monolithically with a thickened base plate, they form a continuous kerb that resists lateral and vertical loads. Structural reinforcement, such as mesh or rebar, further enhances load-bearing capacity for heavy-duty applications.
Weather and Freeze-Thaw Durability: In climates that cycle through freezing and thawing, water ingress can crack and spall many hardscape materials. Air-entrained concrete mixes incorporate microscopic bubbles that accommodate water expansion as it freezes, preventing internal stresses. This technology ensures that edging blocks or slabs remain intact and aligned across varying temperatures. Seasonal inspections for surface chips allow for timely repairs before deeper damage can develop.
Versatility in Shapes and Finishes
Concrete can be cast in virtually any form, from straight-edged kerbs to flowing, curved borders that follow planting beds. Moulded profiles are suitable for modern minimalist designs as well as more organic, naturalistic schemes. Colour pigments and surface treatments offer a broad palette of finishes to complement stone, timber, and planted areas. Decorative techniques such as stamping, exposed aggregate, or brush finishes create eye-catching textures that elevate border details to a design feature.
Listed below are ways in which concrete edging can be customised to suit diverse landscape styles.
Moulded Shapes and Profiles: The use of prefabricated moulds allows for curved, scalloped, or ornate edging sections that install quickly on site. Moulded units lock together for continuous alignment, even on angled curves. Suppliers provide a range of kerb heights and reveal depths to match any planting scheme. For unique projects, on-site formwork permits bespoke shapes that reflect individual design visions.
Colour and Texture Finishes: Integral pigments mix directly into the wet concrete for consistent, fade-resistant hues throughout the material. Surface treatments such as acid etching or sandblasting reveal subtle texture variations that add character. Exposed-aggregate finishes embed pebbles or crushed stone at the surface for a sparkly, slip-resistant edge. Brush finishes create light striations that improve grip under wet conditions while lending a linear design element.
Custom Decorative Inserts: Small accents like glass chips, metal strips, or contrasting aggregate inlays can be embedded within the edge profile. Inlaid materials unlock creative expressions, from geometric patterns to flowing ribbons of colour. Foil or shell inserts catch the light and draw the eye along pathways and planting margins. Proper sealing over decorative inserts ensures that moisture does not penetrate beneath or dislodge them.
Low Maintenance Requirements
Once installed, concrete borders demand minimal care to preserve their appearance and performance. Unlike timber, there is no need for annual staining, painting, or pest control measures. Periodic cleaning with a jet wash or stiff brush removes built-up dirt, moss, and algae from the surface. Concrete’s robust nature means that mechanical damage is rare, and small chips can be repaired locally without replacing entire sections.
Below are the maintenance advantages that make concrete a cost-effective edging solution.
Minimal Cleaning Needs: Routine sweeping or occasional jet washing maintains a crisp appearance without harsh chemicals. Mild detergents or specially formulated concrete cleaners tackle stubborn stains without harming surrounding plants. A light scrub once or twice a year prevents organic growth in shaded or damp areas. Because the concrete is colorfast throughout, cleaning does not affect its original hue.
Paint and Sealant Options: Although not required, sealers enhance concrete edges by repelling water, oil, and efflorescence. A breathable sealer allows moisture vapour to escape while blocking liquid ingress, reducing the risk of watermarks. Transparent sealers retain the original texture and colour, while tinted options can slightly deepen hues for greater contrast. Reapplication every three to five years keeps the surface glossy and protected.
Easy Repairs for Chips or Cracks: Hairline cracks are common in any concrete surface but rarely compromise structural integrity. Crack fillers and patch compounds restore a smooth finish in minutes, blending seamlessly with the existing profile. Larger chips can be rebuilt using a mortar mix and finished with a matching stamp or brush texture. The ability to spot-repair extends the life of edging without the cost of wholesale replacement.
How Aggregates Can Be Used for Functional and Decorative Edging
Aggregates encompass a vast array of natural stones, gravels, and recycled materials that offer both structural support and decorative flair. When bound with resin or set dry, they create flexible borders that adapt to minor ground movement without cracking. Aggregates also introduce colour variation, shimmer, and tactile texture, transforming edging from a mere containment device into a landscape accent. Choosing the right aggregate blend balances functional performance with the desired visual impact.
Installation methods vary from loose gravel strips to resin-bound panels that lock stones into a monolithic surface. Dry-laid aggregates are simple to top up and refresh seasonally, whereas resin-bound surfaces provide a permanent, sealed finish. In either case, aggregates allow water to permeate the border, alleviating drainage concerns. Proper selection and installation yield edging solutions that are both practical and artistic.
Selecting Aggregates for Stability and Strength
Not all aggregates perform equally under load or in wet conditions. Particle size, shape, and mineral hardness determine a material’s load-bearing capacity and resistance to degradation. Angular stones interlock better than rounded gravel, providing stability under foot traffic and wheel loads. Mineral abrasiveness affects how quickly edges wear smooth over time, influencing maintenance intervals and appearance.
Below are essential criteria for choosing aggregates that will hold their shape and integrity as garden borders.
Size and Gradation Considerations: Well-graded mixes combine various particle sizes, filling voids more effectively and reducing movement under load. Oversized stones can protrude and create tripping hazards, while excessively fine grains may wash away. A balanced gradation of around 6 mm to 12 mm delivers both cohesion and surface smoothness. Suppliers often provide pre-graded mixes designed for resin binding or loose laying.
Strength and Mineral Hardness: Hard siliceous aggregates such as quartz or granite resist abrasion and crushing far better than softer limestones. In high-traffic zones, choosing harder stones prolongs the edge’s lifespan and reduces dust generation. Soft aggregates may shed fines over time, creating maintenance challenges and muddy outwash. Referencing aggregate Mohs hardness ratings helps ensure the material suits the project’s demands.
Compatibility with Binding Agents: Resin-bound aggregates require UV-stable binders that adhere strongly to the stone surface. Porous aggregates absorb binder differently, affecting curing times and finish consistency. Conducting a small-scale test panel verifies how a chosen stone reacts to the binder under site conditions. Matching aggregate absorption rates with binder specifications prevents surface discoloration and weak bonding.
Decorative Aggregate Options for Textural Contrast
Beyond pure function, aggregates can transform borders into a highlight feature. Selecting materials with varied hues, reflective qualities, and irregular shapes creates visual interest along pathways and planting beds. Contrasting textures—such as pairing smooth river pebbles with crushed brick—define separate planting zones while maintaining an integrated aesthetic. Decorative aggregates complement concrete edging by introducing a warmer, more organic feel.
The following decorative aggregates are popular for edging accents and patterns.
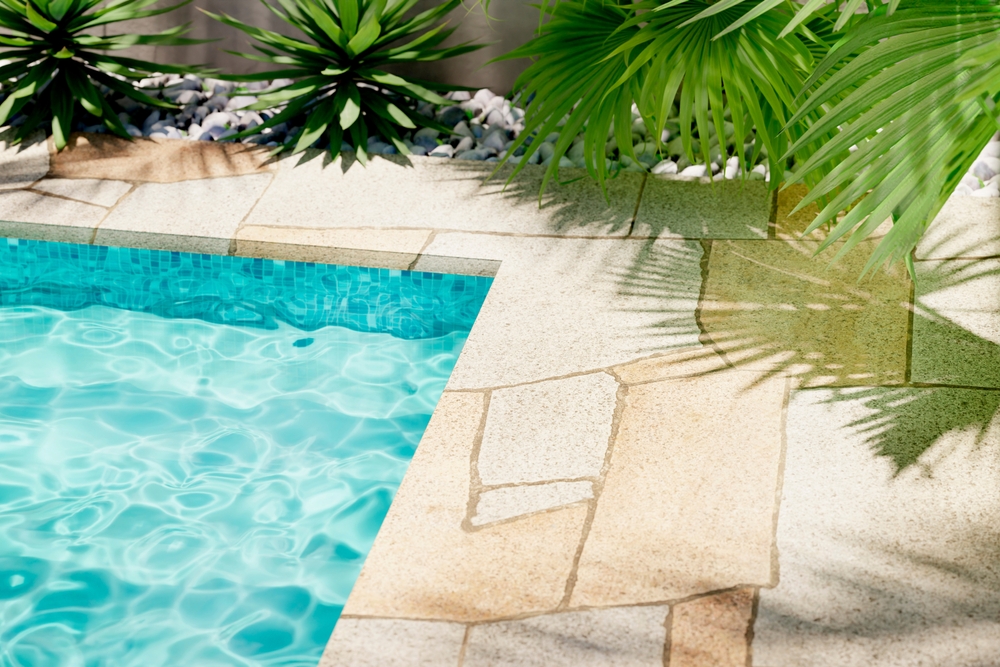
River Pebbles: Smooth, rounded pebbles in mixed earth tones offer a polished, natural look. Their tactile quality invites barefoot exploration in play areas and pool surrounds. Subtle reflections from wet stones add fleeting highlights that enrich the border’s appearance after rain. Laying river pebbles on a stabilised edge prevents them from spreading into adjacent lawns or planting beds.
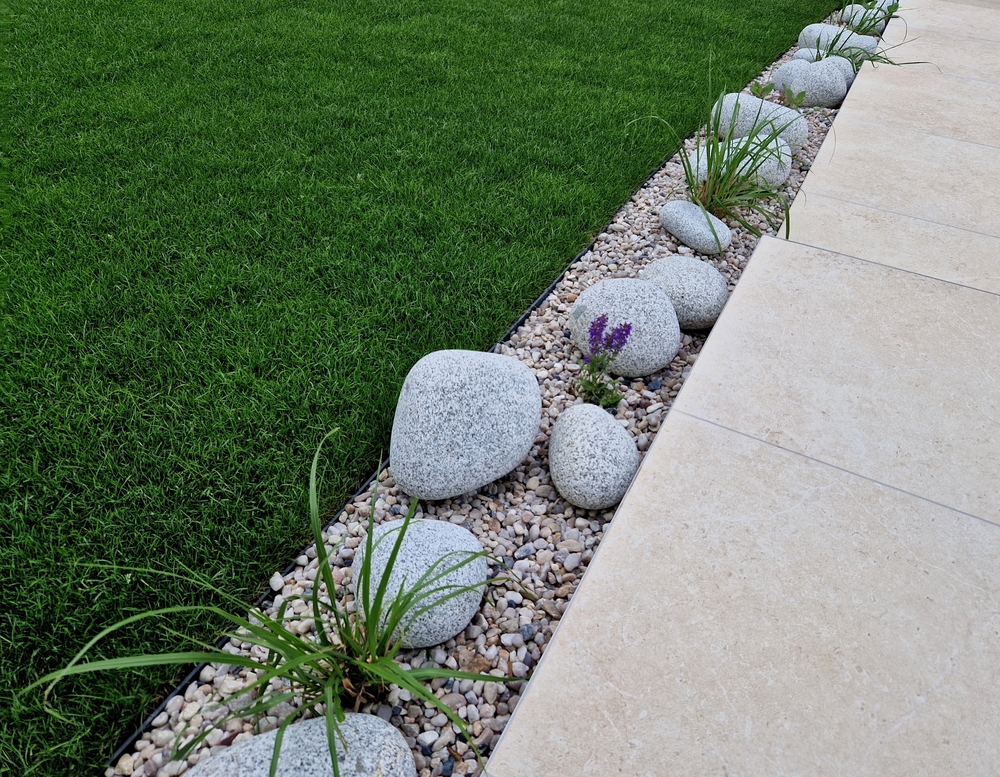
Crushed Granite: Angular fragments of pink, grey, or black granite deliver a sturdy, geometric texture. With clean edges, crushed granite locks together when compacted, making it suitable for walk-on borders. Over time, granite develops a gentle patina that softens sharp contrasts and deepens colour saturation. Its durability under UV exposure ensures colours remain vivid year after year.
Recycled Glass Chips: Tumbled glass pieces in vibrant greens, blues, and ambers catch the light and add sparkle. Properly coated to remove sharp edges, recycled glass elevates contemporary garden schemes with reflective accents. The material remains inert in soil contact and resists fading under sun exposure. Used sparingly, glass chips draw attention to focal points without overwhelming the planting palette.
Installation Techniques for Aggregate Borders
Successful aggregate edging relies on creating a stable base and binding system appropriate to the chosen material. Loose aggregates need containment edges and periodic raking, while resin-bound surfaces demand precise mixing ratios and curing conditions. Planning the installation sequence and protecting adjacent lawns and beds ensures a neat outcome. Attention to detail during edge formation yields borders that stay in place and look sharp for years.
Outlined below are proven installation approaches for both dry-laid and resin-bound aggregate borders.
Stabilising Base with Sand and Cement: Mixing 5 % cement into a sand sub-base locks loose aggregates in place without full resin application. Once compacted, the mixture crystallises into a firm layer that resists washout. Topping with a layer of loose decorative stone completes the border with minimal labour. Regular sweeping reinstates material after heavy rain or foot traffic.
Using Resin-Bound Aggregates: Precise measurement of binder to aggregate—typically at a 7 % to 10 % ratio by weight—ensures consistent curing and surface integrity. A low-profile trowel spreads the mixture in even layers of 12 mm to 18 mm thickness. UV-protected binders prevent yellowing and maintain colour fidelity in direct sunlight. Curing times vary by temperature and humidity, so planning for a dry window of at least 24 hours is essential.
Compacting and Sealing Surface: After laying, a vibrating plate compacts the aggregate into a firm, interlocking matrix. Light rolling with a rubber-tired roller smooths the finish without dislodging stones. Sealers applied post-cure fill minor surface voids and enhance water repellency. Annual resealing restores sheen and extends the border’s resistance to staining and oils.
Ideas & Layout Tips: Creative Ways to Use Concrete and Aggregate Edging
Combining concrete and aggregate materials unlocks endless possibilities for unique edging features. The interplay of smooth, monolithic surfaces with textured, loose aggregates allows designers to craft focal points and transitions that guide the eye. Layout considerations such as curve radius, pattern repetition, and edge thickness influence both function and aesthetic harmony. By integrating edging thoughtfully, borders enhance circulation routes and frame planting compositions in dynamic ways.
Embracing varied layouts accommodates site conditions and personal style, whether aiming for formal geometry or relaxed organic flows. Plans should consider sightlines, solar orientation, and maintenance access to ensure that the border supports long-term enjoyment. Creative edging can also serve as a subtle wayfinding device, directing visitors through the landscape. Blending materials thoughtfully results in garden edges that feel as integral to the design as the plants themselves.
Combining Concrete and Aggregate in Patterns
Striking edging schemes juxtapose the solidity of concrete with the sparkle and texture of aggregates. Banding, inlays, and chevron motifs create visual rhythms along paths and bed edges. Each pattern can reflect the broader landscape theme, from classic symmetry to whimsical, free-form art. The precision of concrete cast forms pairs well with the randomness of stone scatter, producing a balanced composition that engages both formal and natural sensibilities.
The following approaches illustrate popular pattern combinations for durable, decorative edges.
Striped Patterns: Alternating strips of coloured concrete and contrasting aggregate create bold linear designs. Stripe widths can vary to suggest movement or emphasise garden axis lines. Installing guides during pouring and laying maintains crisp separation between materials. Overlapping colours at joints adds continuity across sections.
Inlaid Aggregate Panels: Sections of exposed aggregate concrete set within solid concrete frames showcase decorative stone surfaces. The recessed panels draw attention to texture changes and can align with stepping stones or garden furniture. Frame thickness defines the visual boundary and provides ready maintenance channels. Panel sizes can correspond to paver dimensions for cohesive hardscape integration.
Contrasting Colour Bands: Colour-tinted concrete bands bordering natural stone aggregates introduce a pop of vibrancy. Pigment choices reflect foliage hues or container accents, tying the edging into the planting palette. Bands can run edge-to-edge or act as intermittent highlights along longer borders. Sealing enhances the concrete hue and protects band edges against scuffing.
Curved vs. Straight Edging Designs
The geometry of an edging line profoundly affects a garden’s character. Straight edges convey formality and crisp organisation, while sweeping curves suggest fluidity and naturalism. Mixing both elements within a single project adds visual interest and breaks monotony. Careful consideration of curve radius prevents awkward transitions and ensures materials conform smoothly.
Outlined below are layout tips for implementing curved and straight edging in cohesive designs.
Tools for Curved Forms: Flexible edging strips, garden hose guides, or pegs can outline desired curves before digging trenches. Following a consistent radius prevents flat spots that create unexpected corners. Pre-curved concrete units or bespoke formwork streamline installation for complex curves. Using shorter units on tighter bends maintains alignment without cracking.
Clean Lines for Straight Edges: Long straight sections benefit from laser-level guidance or taut string lines. Edge materials with male-female interlocks speed up alignment and reduce cutting on-site. Keeping expansion joints every 1.5 metres in straight concrete edging controls crack patterns. A uniform depth ensures consistent edge height and simplifies lawnmower use.
Balancing Curves and Lines in Design: Combining straight and curved edges in a single layout invites movement while retaining structure. Formal dining or seating areas may feature rectilinear framing, whereas planting zones leverage organic, flowing borders. Transition zones—such as gateways or path intersections—are ideal places to shift geometry. Visual markers, like contrast bands or lighting, reinforce the change in edge direction.
Integrating Edging with Planting Schemes
Effective borders interact with surrounding plantings to both contain and showcase vegetation. By placing low groundcovers adjacent to edging, the borderline softens and blends into the garden bed. Taller plantings near concrete edges provide shade and break up the hardscape edge visually. Interspersing edging materials within mixed plantings draws the eye along flower lines and highlights seasonal changes.
Below are ways to marry edging details with planting arrangements for maximum impact.
Framing Flower Beds: Positioning concrete kerbs at bed perimeters emphasises the shape of planting schemes. The neutral tone of uncoloured concrete complements vibrant blooms and lush foliage. Slightly raised edges protect soil from mower overreach and keep mulch contained. Continuous bed frames also guide irrigation and reduce overspray onto paths.
Defining Pathways: Aggregate borders alongside gravel or paved paths create a seamless transition between surfaces. A narrow band of exposed aggregate provides ripple-proof edging that discourages materials from spilling onto walkways. Matching aggregate colour to path finishes unifies the palette. Edging heights can double as subtle seating or plant-resting ledges.
Highlighting Focal Plants: Circular or semi-circular concrete edging around specimen trees or feature shrubs draws attention to key landscape elements. Filling the space within with contrasting aggregates amplifies the visual drama. The edging rim serves as a clean backdrop that elevates the plant’s form. Installing lighting behind the edge rim illuminates the feature during evening hours.
A well-planned edging system transforms garden boundaries into lasting landscape assets. By choosing concrete and aggregates thoughtfully, designers create borders that marry durability with personalised style. Each material brings distinct benefits—concrete for strength and precision and aggregates for texture and permeability. Together, they form a unified framework that supports plant health, prevents maintenance headaches, and enhances outdoor enjoyment.
With Over 57 Years of Experience, You Can Trust us!
Call our friendly and highly experienced team today to get your concrete, sand, aggregate, and landscaping products.